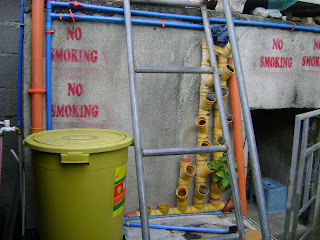
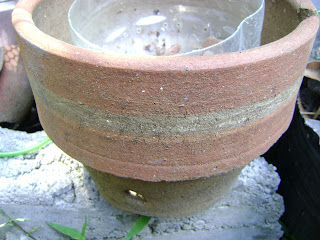
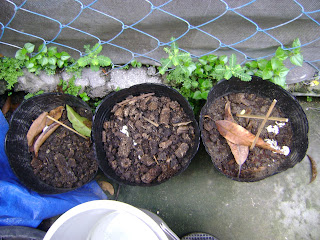
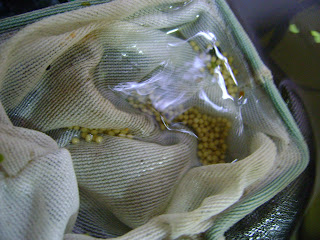
Kratky method uses the natural behavior of the plants capillary action to provide both the nutrient solution and air. The concept is so simple and proven effective with the right resources. You can google for some pictures and videos only just use the word hydroponics and Kratky.
Thursday, October 5, 2017
Kratky
Kratky method uses the natural behavior of the plants capillary action to provide both the nutrient solution and air. The concept is so simple and proven effective with the right resources. You can google for some pictures and videos only just use the word hydroponics and Kratky.
Saturday, September 30, 2017
Wednesday, September 20, 2017
Bardok
One of my biggest achievement since day one of my R&D with Aquaponics was my success with keeping this fish alive. It was a burden from the start with all the trials and errors, and end up killing so much fishes before I made it to this point with almost a kilogram of fish. I named this fish of mine Bardok, and he is my favorite fish among others and planning to keep until the day of his lifespan and also to be able to figure out how big would this fish grow with my current setup and maintenance.
Bardok is a SaltUno strain or Molubicus. Is a cross breed of fresh water and salt water tilapia strain.
Sunday, September 17, 2017
700W and Growing
The Campaign to a self sustainable power source for my backyard farm and aquaponics is just keep growing and growing, although the pace is slow I am happy that the developments is continuous.
Solar power is expensive alternative source of power at the moment, but a necessary step to keep your fish and plants alive in an area where power is unstable.
This investment has saved my project countless of times. And my primary goal with this part of R&D is a 3000W of solar power source!
I would like to give thanks to all those who supported my research, by donations and by buying my produce. The buyers of the fish and veges and the cash donations.
My campaign was difficult from the beginning, it was like a me against the world scenario. Only a few people believed that it is possible, and many gave doubts due to the slow and expensive progress. One day we will prove them wrong!
Saturday, September 2, 2017
DIY Netpots
Today's episode is about the DIY netpots out of disposable plastic water or soda bottles. I made the effort to share this idea even though I know that probably most Aquaponics and Hydroponics DIYers have applied this idea. But searching the internet doesn't yield the expected results.
The purpose of this DIY guide is to give beginners the idea on how to save on parts and materials for this hobby. Not only it will help them with the cost but also with time on shipping or effort of going to distant store to source out this part. And moreover you can also minimize household garbage output with this idea.
First we have to gather the materials and the tools:
- Empty soda plastic bottles.
- A heavy duty scissor.
- a side cutting pliers.
- and a blade cutter.
First step is to cut the plastic bottles into two, the length between top or bottom will depend on your setup.
Second step is slice the caps like a net or star pattern using a blade cutter.
Third is to push the sliced plastic outwards and cut some to give way to roots and air using your side cutting pliers.
And now you have your DIY net pot from disposable soda or water plastic bottles.
some variations.
Saturday, August 19, 2017
Tuesday, August 15, 2017
Aquaponics in Manual Mode
Aquaponics doesn't have to be restricted in a close loop, where setup for starters tend to be expensive. You can do aquaponics without expensive water pumps, all you need is a bucket and a deeper or watering can for that matter.
Plant your seedlings in a recycled containers or pots, then everytime you change water or clean your fish tank, use the nutrient filled water from your aquariums to water your plants. You can setup this plant filled container to filter the water or just simply on the ground.
This method is laborious, but it will save you some extra cash if you are in a tight start and earn a few muscles at the end of the day.
Weather automatic or manual, the goal is to use your fish to feed your plants and your plants to use the water or clean it.
Friday, August 11, 2017
New Weapons
"Don't Be A Fool Use The Right Tool!"
These are the words that I use to remember when working on things that requires engineering and scientific application. Words thought to me and my classmates during college days by our civil 101 instructor. Words that still ring a bell everytime I make stupid output because of stupid practice.
So this time I would like to upgrade my arsenal with new addition of tools. The TDS (Total Dissolved Solids) Meter and the PH Meter.
With the following tools I would be able to record data that are essential in troubleshooting water problems, thought these tools are still lacking, it will still be able to provide important information regarding the quality of my water with respect PH.
Tuesday, August 8, 2017
Water Filter
It is essential to maintain your water quality for your fish and plants with your aquaponics setup. Putting up your own filter is part of that challenge. In this setup I reused a margarine container filled with river rocks and pebbles, this may not be a typical filter setup found in most aquaponics but at least it will do the job and purpose intended.
I placed a standpipe in the middle as a secondary filter and as an overflow drain in case the pebbles fail when I am gone for a long time. By the way the bottom of the container is holed just enough to strain the pebbles to let water pass leaving solids behind.
Using second hand materials or reusing or up-cycling parts can save you money while helping the environment. Not only it does the job it is fun to work with.
Saturday, August 5, 2017
How to make your own clay Pebbles
Hydrotons or clay pebbles are so expensive and hard to find in my location, and if I do look for it online it will make the expenses of my aquaponics and hydroponics projects go steep!
So today I want to share to my fellow enthusiasts and visionaries of this field while making a run for their first base. The amazing DIY clay pebbles aka hydroton, but this time we will call it the clay chips ^^.
Now go get this clay pot lying around your laboratory that has not been used for a year since you've been messing around with your soilless gardening and farming. The best thing on this part, is that you can use even cracked clay pots as your raw material. For FREE I repeat FREE ^_^
Then go get a hammer straight from your toolbox and pound it with medium effort, the goal is to make chips of your favored sizes not to crash them to powder. And after a few minutes you will have something that would look like this.
Now you have a clay chips medium that works just like an expensive hydroton or clay pebbles! Easy and awesomely cheap! This method is tried and tested by yours truly me.
Now go out there and hunt for free clay pots around your backyard or your neighbors' I'm sure they they'll be happy to give you there unused or discarded clay pots for free. If they ask you why, just tell them climate change needs help and by recycling there pots you are doing your part with their help ^_^!
Friday, August 4, 2017
Going Hi-Tech
Making use of electronics to further develop my backyard aquaponics and urban gardening or farming. Just like the good old days of student life, making projects to ace a major subject. But this time its for the real life episode.
I stumbled upon this micro-controller called arduino a year ago, since then I was saving as much as I could to purchase parts and modules, so if a Billionaire is reading this post please hit donate, I would be more than happy to say thank you, and that your donation will go to the development of a food production facility for my local community.
These Arduinos were not cheap when they first release, Price was steep during the early days of release of this democratized MCU. But just recently prices were going down and I was able to purchase modules online. An arduino mega 2560 (1 year old), a 2 channel relay module and a DS1307 RTC with built in expansion for temperature sensor (optional).
I'll be posting more updates and DIYs regarding my R&D. Post comments or questions or suggestion. Thank you for your interest and support.
"Buy Your Own Tools! Upgrade Your Skills!"
Wednesday, August 2, 2017
Urban gardening or Farming?
Gingers in pots.
Though the following setups are in pots, they are well fed with water from my fish tanks to supply the necessary nutrition that these dudes need.
Fig. 1
I have been experimenting on potting mix for my urban farming, combinations on different types of soils and organic matter from available sources, that are as much as possible for free. Figure one was a result of unused fresh water sand topped with dead and decaying leaves.
Figure 2 was a result of sand that came from the sea literally, though topped with organic matters the salt from the sand took its toll! I suspected that this would happen, but I ran out of fresh water sand and by request someone brought me the other sand ^_^
Fig. 2
Fig.3.a
Fig. 3.b
Fig 3.c
Figure 3.a to Figure 3.c are results of mixtures of fresh water sand, garden soil and organic matters. These dudes are about a month old and we will have to wait a little more to see better or worst results. But I am hoping for the best!
Monday, July 24, 2017
Magna Daphnia
My first Magna Daphnia, I ordered online from Aqua pets at Kidapawan City. Bought it for 350 pesos including van shipping, same day pick up.
The first day these dudes arrived, they were like in hundreds by estimate. I was hesitant if I could help these dudes survive for the next 24 hours.
Luckily after 24 hours they are still alive and kicking by feeding them with used water from rice preparation.
If my culture is successful, I will sell some to local aquarist for their own live feeds for their aqua pets.
Currently I am reading and watching videos about these live feeds for pointers on how to successfully culture them for a sustainable food source of my tilapia.
Sunday, July 16, 2017
MARK II
As results of trial and error progresses so as the level of tests. Mark II of vertical grow out for my plants are made of pvc Y and T fittings, this is a youtube inspired setup as endorsed by a friendly online forum admin sir James Howard in facebook group - Aquaponics Pinoy Enthusiasts. I prefer using the vertical method due to the space limitations that I have, I am only working on a 3 by 4 meters of flat land space excluding the re-purpose tank a 2m by 2m hollow and elevated concrete.
For the time being, I have used bulb onions as test subjects, and so far they all went well and healthy. Currently resources and work force are focused on building this setup surrounding this re-purposed tank. But at the moment the operation was on halt, due the the availability of cheap pvc fittings.
With respect to my current situation, I would like to recommend to fellow enthusiast the vertical setup for the plants' grow out. It saves space and manpower during cleaning, and ward off water dwelling pest and eliminates *dead zones that exists with horizontal setups. Moreover use same brand and quality of pvc fittings as much as possible to avoid conflict with dimensions and measurements during setups. For Starters who are involved with trial and error, Always buy the cheapest functional parts save and conserve your resources specially with pipes and fittings and buy your own tools or improvise your own.
Dead zones - an area where water stagnates and oxygenation is less or zero. For example are corners of a rectangular containers.
Dead zones - an area where water stagnates and oxygenation is less or zero. For example are corners of a rectangular containers.
Although dead zones can be eliminated by putting drains or placing air diffusers or aerators. But it also depends on the shapes and sizes of containers. Weight in the pros and cons of your preferred grow beds. Good Speed to us all.
Monday, July 10, 2017
Red Tilapia Eggs
Curiosity is the mother of discovery, and for me it is also the mother of all teacher.
I was so curious how tilapia eggs would look like and would it be possible to have fish by incubating them outside the mothers mouth. The picture below shows how the eggs would look like when they are fertilized, they look yellowish, pale and white eggs are either unfertilized or dead. And other than curiosity, I wanted to learn to produce tilapia in a little bigger scale an indoor fish farm and vegetable garden.
During this time of my R&D, my skills and instruments are all lacking. I wasn't able to turn these eggs into fry. Googling showed me the way to, apparently one needs an egg tumbler that mimics the activity inside the mother tilapia's mouth during incubation period.
Another reason that caused the death of these eggs was the circulation of the water, it must be well oxygenated from an air pump or air compressor. Just like the mothers mouth, oxygenated water comes from her gills. Third reason is contamination, once there is no water circulation fungus can thrive, white fungus will develop around the eggs and infect them and eventually dies.
Using my imagination and creativity plus ingenuity, I created my own egg tumbler. After watching a few videos on youtube, I went to my stockpile of unused parts. A pvc adapter, a plastic screen and an acrylic tube that came with my siphon pump.
It was an amazing experience watching these dudes that look like little Nemos, taking care of them until they are ready on the real world. The picture below are fry with yolk sacks still on.
And finally swim up fry are cared and nurtured into advance fry. Feeding these dudes are laborious a 100% body weight ratio to their feeds and 10x a day feeding rate. I used the Tateh feeding guide that can be found by googling Tateh feeding guide.
The picture below are advance fry in close up. When they rich a length of 1 inch they are ready for transfer in the bigger fish tank for rearing or fattening.
Subscribe to:
Posts (Atom)


